Showing posts with label modern quilts. Show all posts

Tuesday, March 6, 2012

Shortcuts Make Me Happy.

Quilting shortcuts make me very, very happy.
The only problem is, there's not that many of them.
Except for when I make quilts for myself.
Then, there's lots and lots and lots of shortcuts.
I never take shortcuts when making quilts for others... I want to make sure I put my best work into what I send out into the world.
My quilts are a reflection of myself in some ways... and I don't want to look cheap and thrown together, if you know what I mean.

DSC_0095

But, oh man, when I make a quilt for myself I like to push the limits in the way of shortcuts.
I will cut corners like there's no tomorrow.
I don't know why this is.
Maybe my need for instant gratification?
Maybe because I sometimes feel guilty when making something for myself when I could be making something for somebody else so I try to make whatever it is as fast as possible?
Maybe because I'm usually trying to squeeze in the making of an entire quilt between several nap times?
(And who knows how long those last, right?)
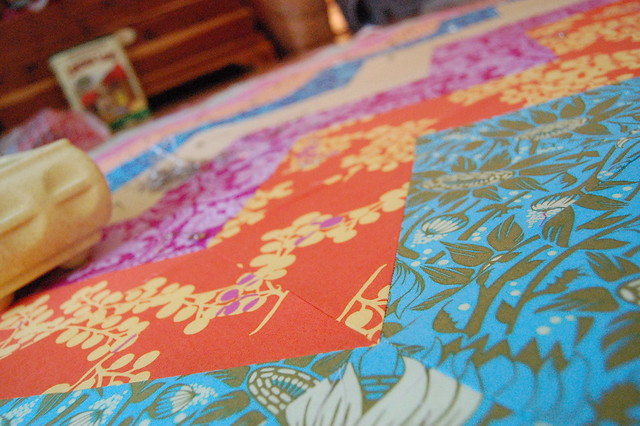
DSC_0098

Whatever the reasons for my shortcut taking... this quilt was FULL of them.
And guess what?
It was one of the most problem free quilts I've ever made!
It came together like a dream!
Weird, right?
I know. It shouldn't make sense.
But that's the true story and it makes me ohsohappy!
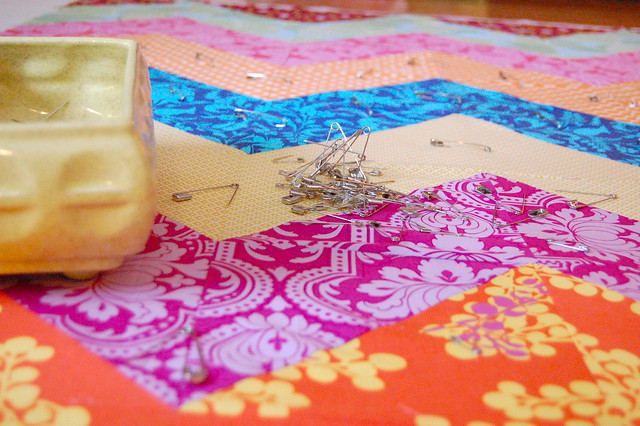
DSC_0097

So, here's my shortcut-laden zig-zag quilt that I love dearly!
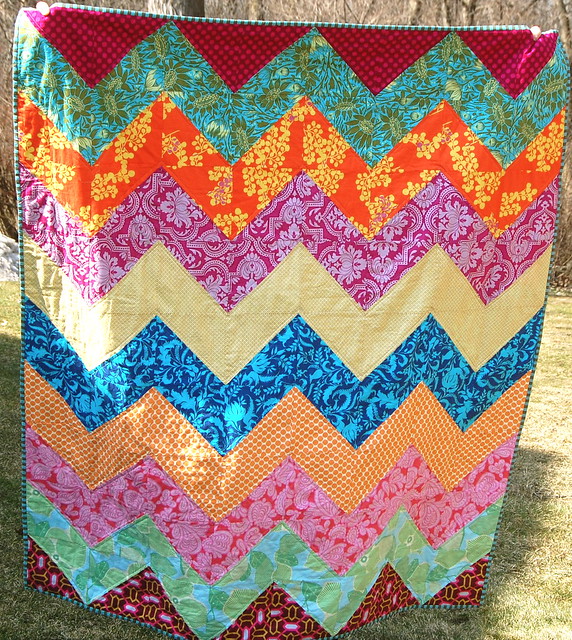
DSC_0006

I was originally inspired by this quilt.
I loved how big it was- so I asked her what her dimensions were and she kindly answered.
(HST method, 8x8" squares, and 10 x 12 rows...I love it when people share!)
My plan was to follow her dimensions exactly, but when I started cutting my fabric,
(that I've been saving for this quilt for quite some time!)
I realized I was only going to be able to make my quilt 8 x 9 rows.
Kind of a bummer, because I like the hugeness of the original quilt, but not a deal breaker for me.
Finished measurements are 56"x 64"... so it's still a nice sized quilt.
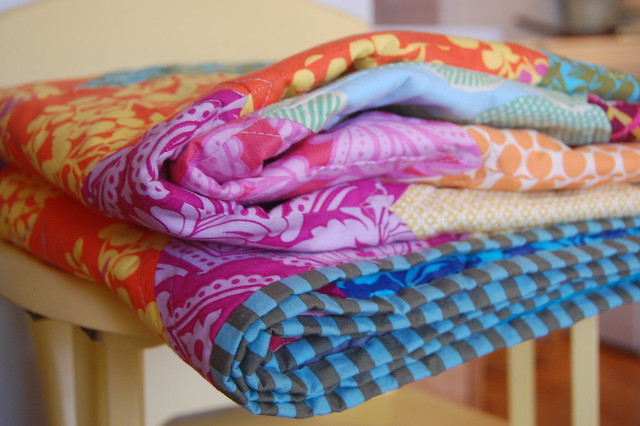
DSC_0007

Other shortcuts:
I didn't draw lines on the diagonals of my squares for making the HSTs
(I'm sure other quilters are cringing right now- sorry!)
I didn't iron or trim my HSTs once finished.
(another cringe!)
I didn't pin a single thing.
(but I never do when quilting...)
And, I didn't iron the completed quilt top before layering everything for basting.
Oh, and I didn't use a walking foot to do my quilting either!
That one was kind of an accidental shortcut because I forgot to switch feet (foots? whatever.)
But the zig-zag quilting was just easy peasy!

DSC_0006_2

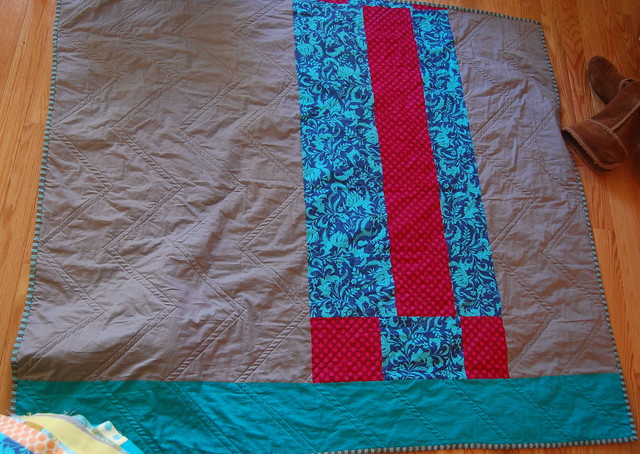
Pieced back:
DSC_0004


All those shortcuts allowed me to take my time while basting...
I actually taped every layer down and pin basted (<---- my fave method!)
All of my points lined up perfectly... magically even!
I didn't have any bunches or uneven/mismatched corners.
(Unfortunately common in quilts I make for myself.)
And, I saved so much time I was able to hand-stitch the binding!
Yippee!

A fairly amazing trade off if you ask me!

Also, I've decided that this year I am going to make at least 10 quilts for myself.
I just decided this like a month ago.
Of all the quilting and sewing I do, it's a shame how few quilts I actually have in our home.

So, I made a list:
(I just typed this exactly how I wrote my list- so it may not make total sense to everybody!)
  1. Asterisk quilt
  2. Herringbone quilt (red, yellow, aqua)
  3. Houndstooth
  4. Swoon blocks (yellow/pink/orange/brown with linen)
  5. Granny squares (scrappy)
  6. HUGE patchwork (scrappy)
  7. Loulouthi whole cloth quilt (handquilted)
  8. Willow/Ellie quilts (room colors)
  9. HUGE lonestar quilt (brights)
  10. Plus quilt (yellow and purple)
  11. Log Cabin quilt
  12. HUGE(er) zig-zag quilt (10 x12 rows)
  13. Subway tiles
  14. Mod Bento Box (aqua, orange, yellow, grey)
  15. Big zig-zag quilt
  16. Finish my king size string quilt and get it quilted
My goal is to make at least 12 quilt tops and of those tops, complete 10 quilts.
I get a lot of my inspiration from other quilts/quilters... I have a flickr group of my favorites here if you'd like to check it out.
There's lots of amazing stuff out there!

Sneak peek of the next quilt I get to cross off the list:
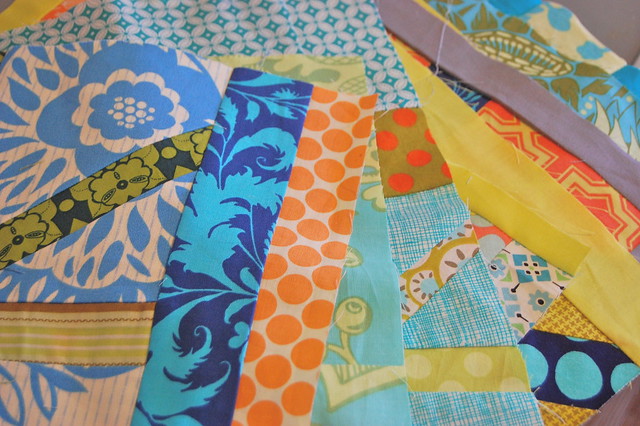
DSC_0004

Happy Creating everyone!

And a big thanks to everyone who welcomed me back... you're the best!

Tuesday, April 19, 2011

Resting and Wandering.

Remember my Hunting Camp Quilt?
Well, you can check it out over at the Sew, Mama, Sew! Blog!
It's being featured as part of the new 'Sewing Trends-What's New?' article.
(you have to scroll down just a bit)
Cool, right?

Anyways, now that the horn-tooting is over...
After the weekend my mind and body needed to rest and wander.
I didn't even move any furniture, but it sure felt like I did.
Weird.
It was probably the painting of the dresser and making of our king size dust ruffle the night before that left me with only 4 1/2 hours of sleep that did it...
Oh well.
Thanks again to Ty and Chelsea (and the Hubby) who did all the heavy lifting for me :)

Basically, our entire upstairs got moved downstairs and into our new bedroom and we had to drive all over to pick up miscellaneous heavy items for the girls' room.
I watched.
I'm so glad all that's finally done and I can continue on with painting and whatnot.
I was stalled there for a minute.
I don't like being stalled....
When I get to feeling creative I like to go ahead and do it.
Or else I get grumpy.

I will show you pictures once I pick up my camera and it's not dead from me leaving it plugged in to the computer.
I'm pretty good at that.
That, and remembering to charge it for some special something and then forgetting to take it to the special something.

So, as excited as I am about all the
bedroom sewing
and
nursery/ big girl room sewing,
I needed a "mindless sewing" project that had nothing to do anything that I should have been doing.
You know, quick and easy with no thinking.
I'm all about no thinking...

This was the ticket:
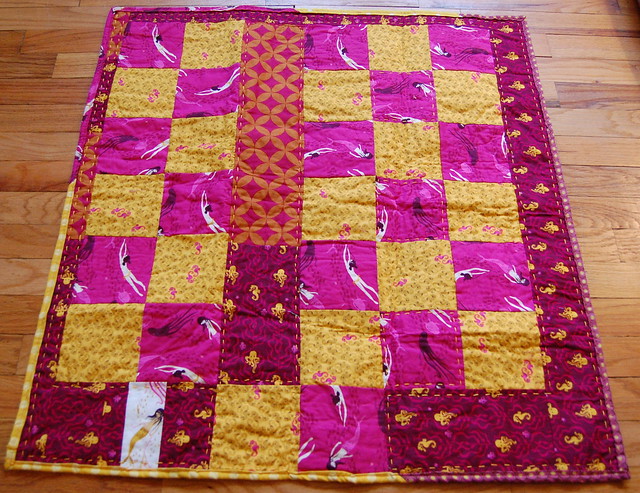
Scrappy Mendocino Quilt

I already had some leftover squares cut from a long-ago quilt and I just
started grabbing and sewing.
And then I added in a little extra fabric to make it a bit bigger
(and because I had a weird number of Mendocino squares)
It's very scrappy and haphazard.
But that's ok.
Sometimes you just need a quilt like that.

DSC_0925_2
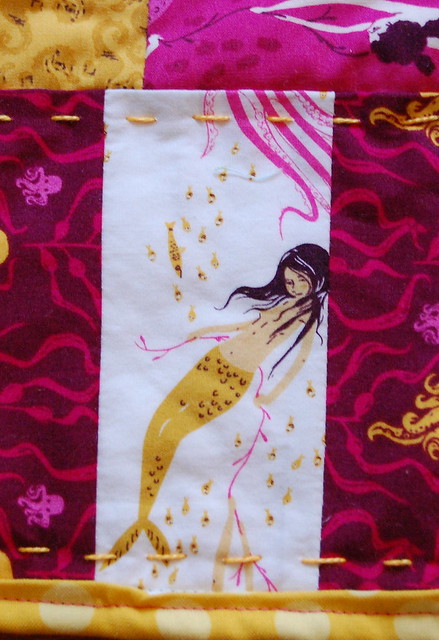
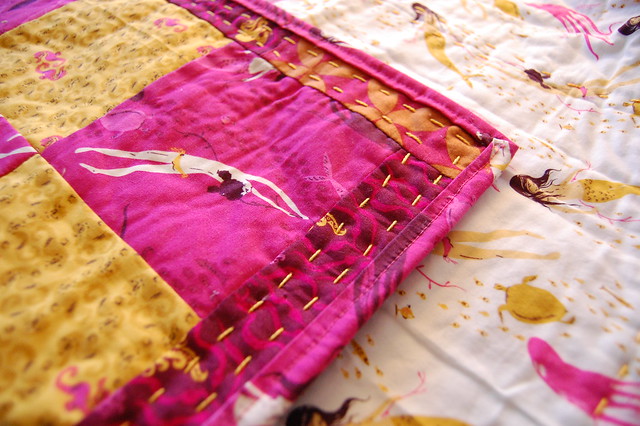
I added a scrappy little mermaid...

DSC_0931
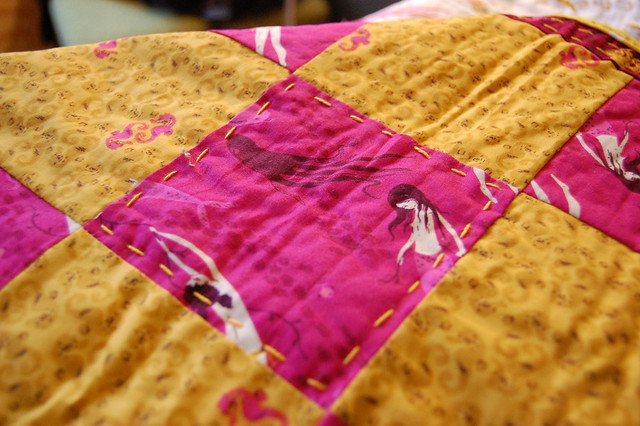
...and some random hand-quilting here and there
DSC_0930

Oh!
And I tried out a new (sorta) binding technique.
I usually sew the raw edges of the folded binding to the front of my quilt, pin to the back, and then sew on the front.
Well, this time, I sewed the raw edges to the back, pinned to the front, and sewed on the back.
I loved my results!
I don't really know what the difference is, but the end product looks much cleaner
from both sides.
I suggest you switch your binding technique up next time to see what you're missing...
you may find a new favorite quilty tip!

Scrappy Mendocino Quilt

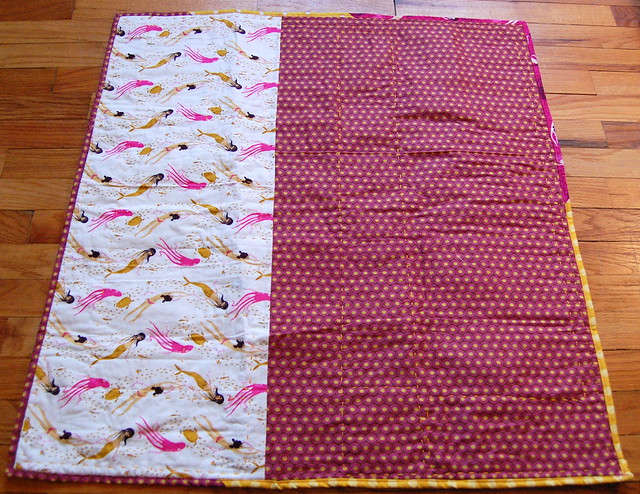
The back was not as scrappy, but still scrappy.
And so is that binding.
I love a scrappy binding, don't you?
And I think I love magenta and yellow together.

Quilt stats:
30x32"
front: Heather Ross Mendocino prints and Anna Maria Horner scraps
back: Heather Ross Mendocino print and Art Gallery Oval Elements
binding: random yellow/pink/purple scraps
hand-quilted
machine stitched binding
warm and natural batting

And if you haven't already,
go leave a comment on this post for your chance to win a quilt kit
as part of the

I'm opening the deadline until Friday night midnight.
Anybody can enter to win!
It's a pretty nifty prize, if I do say so myself, so please enter.


Friday, February 25, 2011

Finishes!


Despite the weirdness, I have been getting quite a bit done around here.
I guess I've gotten used to it :)


The latest completions are a couple of quilts I made for my niece and nephew all the way in Virginia.
(ps: I really miss Virginia.)

For some reason, I always take a lot of pictures of the process of making quilts...
I'm not sure why.
Maybe in the back of my head I want to make a tutorial one day.
Who knows.
But when it comes to finally writing a post about the quilt I finally finished, I never use the process pics.
For all you know, I could be buying quilts elsewhere and saying they're mine!
I assure you, that's not the case.
I have the pics to prove it and from now on I think I will be showing more of them.

Here's some chain-piecing taking place:
(check out my new cutting mat!! I finally got a good one!)

And here are some rows all finished and waiting to be pressed:
Apparently, I skipped quite a few pics between the last one and the next one,
the completely finished quilt.
And that, ladies and gentlemen, is probably why I haven't ever written a tutorial to date.
I forget what I'm doing and just sew.

Triston's finished quilt:
I did some straight line quilting on the diagonal to show off the triangles a bit.
1/4" from either side of each seam.
And I extended the quilt with a wide border on 2 sides of the quilt and added a little interest with some "rebel" triangles.
While making the quilt I labeled those 2 pieces my "little rebels", and it stuck.
I think the asymmetry gives the quilt a more modern look.
And it shakes things up a bit.
Which I totally dig.
And, of course, a little hand-stitched label so Triston knows how much I love him :)
It's a nice baby-size quilt at 34x45", machine quilted and machine-stitched binding.

And here's Gabi's quilt:
I started this quilt quite a long time ago, but never got around to finishing it.
Gabi loves everything pink, so when my sister said she needed another quilt, I thought this one would be perfect.
And to make it even more Gabi-ish, I bound it with some pink zebra print fabric.

For the quilting, I used orange and pink thread and went 1/4" away around the outside edges of the squares, twice.
That sounds confusing. I don't know how else to word it.
I doubt you're really that interested anyway, so I'm going to leave it and move on.
Gabi gets a label, of course.
Have to keep it fair.
This quilt is about 51x51", machine quilted and machine-stitched binding.

I've also made some headway on Willow's Dresden Plate quilt top...
but more on that later because I just realized the water has been running in my bathroom for much longer than it takes to wash little hands,
which never ever means anything good.

Happy Weekend!

Tuesday, February 15, 2011

A Very Special Baby Quilt and Belated Happy Valentine's Day.


I have finished my little girl's baby quilt.
And I am IN LOVE with it.
IN.
LOVE.
It's tied for my favorite with this quilt...the very first quilt I ever made for Willow.

This pretty little number is a string quilt using all the scraps I used to make the Dresden Plates for Willow's new quilt.
I used the paper-piecing method, and there's a pretty good tutorial here.
I modified mine a bit, but who doesn't?
There were 24 string blocks (7" unfinished) and then I used some stashed fabric to make borders around the outside.
(Anna Maria Horner Garden Party, Valori Wells, and some more Anna Maria Horner)


And, as per usual over here lately, I only used scraps and stash fabrics.
I used the same fabric (Ta Dot in Sea) for the center strip in each string block that I am going to use as the background for Willow's twin-size Dresden Plate quilt, so that there will be some similarity between the two quilts since they'll be sharing a room.
And because there's SO many different kinds of fabrics in each one...

I LOVE IT!

And for the back I just used some stashed Anna Maria Horner Garden Party, some Heather Bailey Tiled Primrose from the Pop Garden/Bijoux collection, which I also used for the binding, and some Amy Butler Sandlewood from her Love collection.
As for the quilting, I really wanted to highlight the 'squares' or 'diamonds' that the string blocks made once all put together... I really didn't want to chop them up in any way with quilting lines.
So, I decided to quilt 1/4" on the inside of the center strips that made up each square.
And then the same 1/4" inside for the triangles on the sides and corners.
There ended up being no intersecting quilting lines, which is exactly what I wanted.
I tried to show you what I'm talking about... if you even really care, that is.

I ALMOST FORGOT...
Yesterday was Valentine's Day!
My hubby and I don't really do anything for Valentine's Day.
I know it sounds weird, but I like it like that.
Ok, it's not like we do nothing.
I always make him his mom's recipe no-bake cookies and a super-cheesy, way over the top valentine.
I think he secretly loves them. I really do.
He stares at them for a really long time with silly grin on his face... and that's how I know :)

I decided to put them all in a scrapbook this year so they don't get lost...
I mean, we're talking like 7 years worth of some serious Valentines.
I think they're worth saving... now I just have to find that 'spot' where I put them so that they could be found again.
So far I have found the one from 2009.
That's it.
The search is on.

I liked making Drew's Valentine even more this year because Willow wanted to make one too:

...and it is AWESOME.

I love that she loves to do "projits" with me.
It's like the best thing ever.
And she thinks she's the bomb when I let her use her own glue stick and her own scissors.
All she wanted to do yesterday was make Daddy's "Balentine", ride her bike to the movie store to pick out "Pickle Me" (aka 'Despicable Me'), and then wait for Daddy to get home from work so we could watch the movie in our jammies, with popcorn and macaroni and cheese.

So, that's exactly what we did!

Friday, June 19, 2009

Dust Ruffles, Crib Quilts, and Sheets, Oh My!

A shot of the dust ruffle:
Close-up:
The front of the quilt:

And the back of the quilt:

There! Now I think everything has been photographed and (b)logged :) All I need to do now is put a bow on it and get it out to Arizona! Thanks Katie!

Thursday, June 4, 2009

I. Love. Projects.

I do. I just get so giddy and smiley. The more I'm in the middle of, the better. At least for now...
So, I'm all up to date with the Old Red Barn Co. Quilt along. I'm very proud of myself. And I love the way my quilt's starting to take shape. It's gonna be a beaut!

The "above" picture is my favorite quilt block and the "below" is all 12 of my strip set blocks. Pretty huh?

FUNTASTIC!

Here is one of my newest little projects. She's just a quilt top right now, not a full-fledged quilt. She still needs some insides and backing. I'm at a loss for the backing fabric. I think I want to go in the "red" direction. It seems like I'm always using pink or green, but I can tell, this girl wants red.
And another little picture!
I love this top. It's so colorful and...funtastic!


Saturday, May 16, 2009

The One That Started it All!


So....this quilt is near and dear to my heart because it is the absolute very first quilt I ever made AND it was for my daughter. I love it. It's so soft and cuddly (and cute!) I was very impressed with myself, I'm not gonna lie. Go me. If you look really closely you can see my mitred corners and my hand-sewn, blind stitched binding.

This quilt is pretty big...big enough for me to use too!
...and the back.

Wednesday, May 6, 2009

Sunshine and Bubblegum


This quilt is so much fun! I just love it. Looking at it makes me smile...I made this one for my niece Peyton; now she carries it with her wherever she goes!


A Perfect Blend of Pinks and Greens!

Here's one of my very firsts!
Pretty Pinks + Fun Greens = Sweet Satisfaction!


The pink/green combo makes this blankie sweet, but not too girly!