Thursday, June 14, 2012

Reacquainted.

Well, hello there.
It's been a while.
In fact, it's been so long that my flickr pro account expired,
picnik no longer exists and the user interface of blogger has completely changed.
True story.
It took me a minute to navigate my way around you, old friend.
Oh, how I've missed you.
I've written countless posts in my head, none of them making it anywhere near paper or keyboard, so I really have no proof of them.
Or can even remember them, for that matter.
Whatever, they sounded fantastic in my head.

As always, I've been making things.
I love making things.
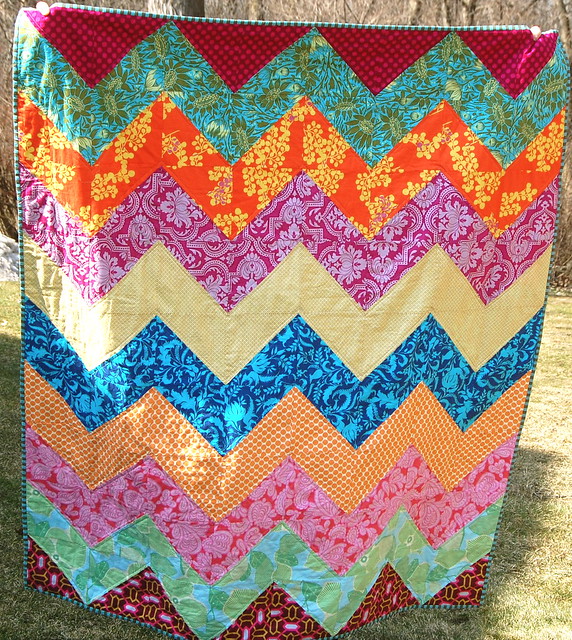
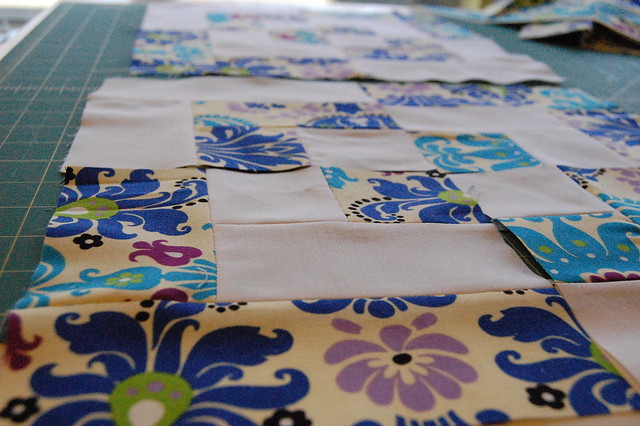
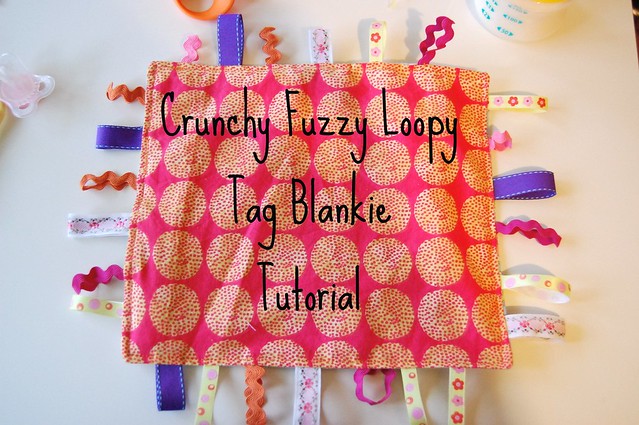
Here's the latest of the things that got made:
DSC_0144_2
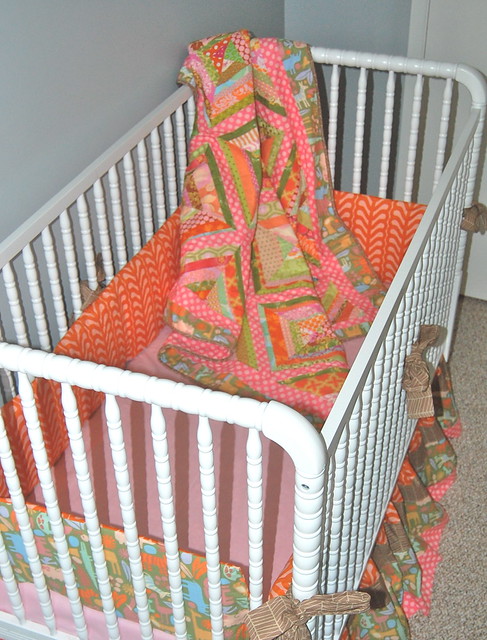
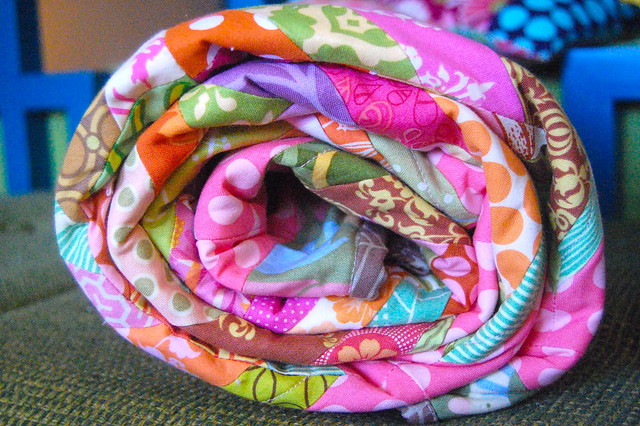
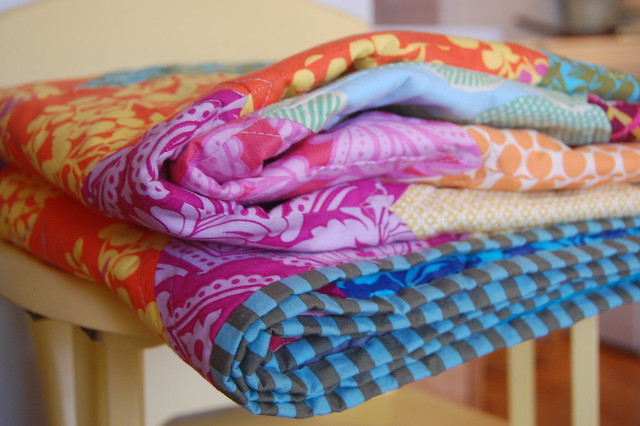
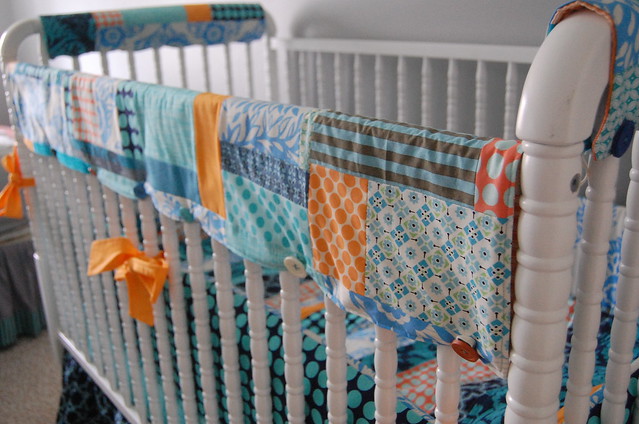
(And I just love quilt rolls. They are so fun. Like a little swirl of cozy, no?)

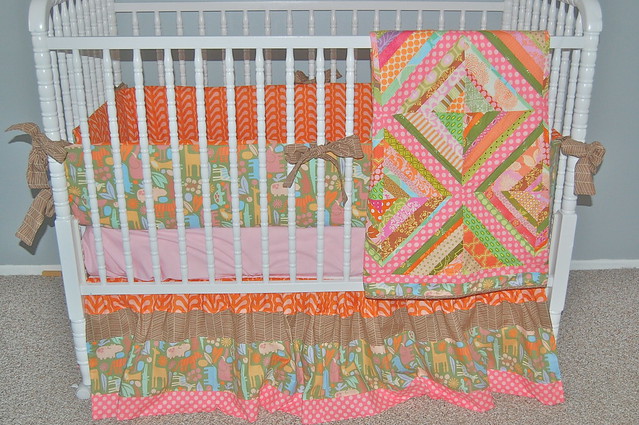
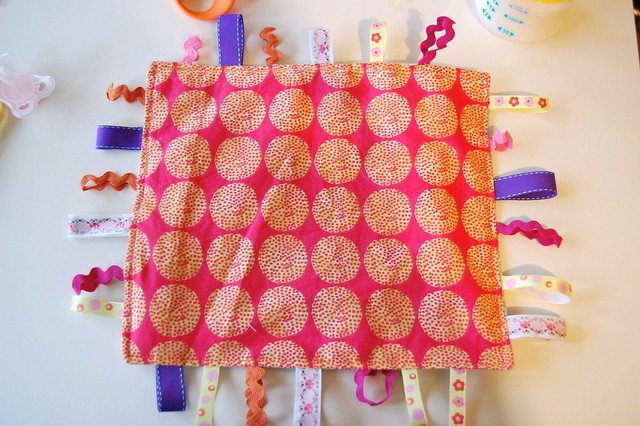
This is a custom crib bedding set with crib teethers. 
DSC_0127

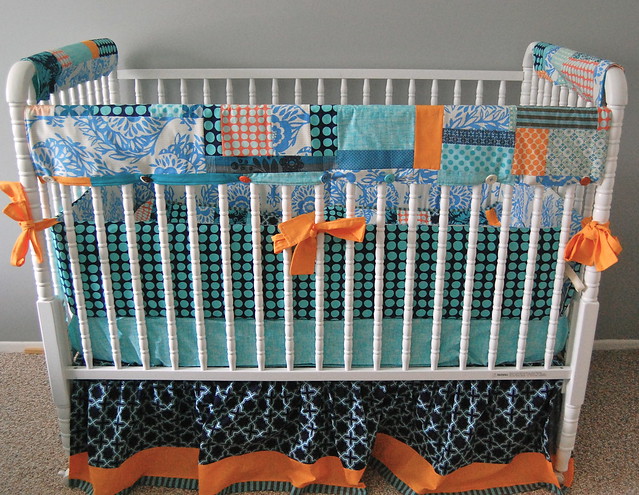
This is probably one of my favorite color combos. It's so bright and fun, but not babyish.
Well, a little babyish, but not in a regular 'baby' kind of way-
more like an 'I'm an awesome baby' kind of way.
Or something like that. 
DSC_0126

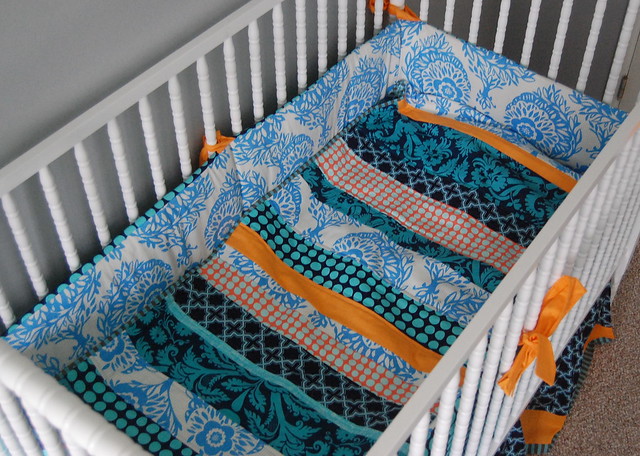
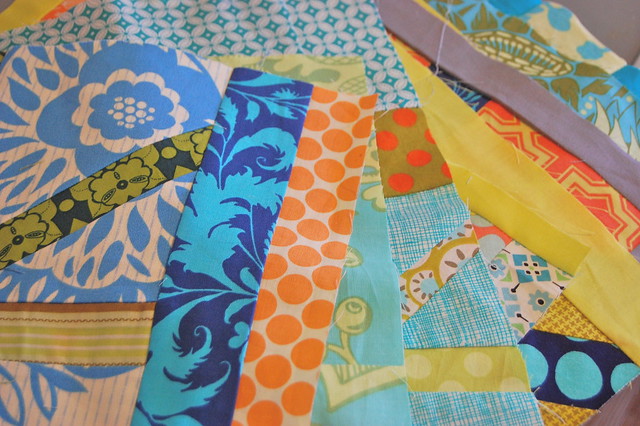
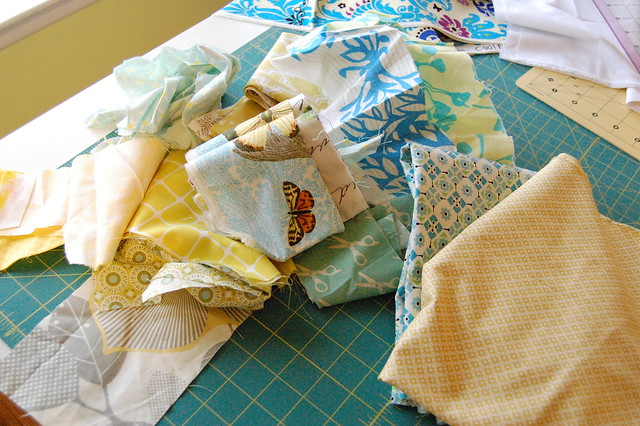
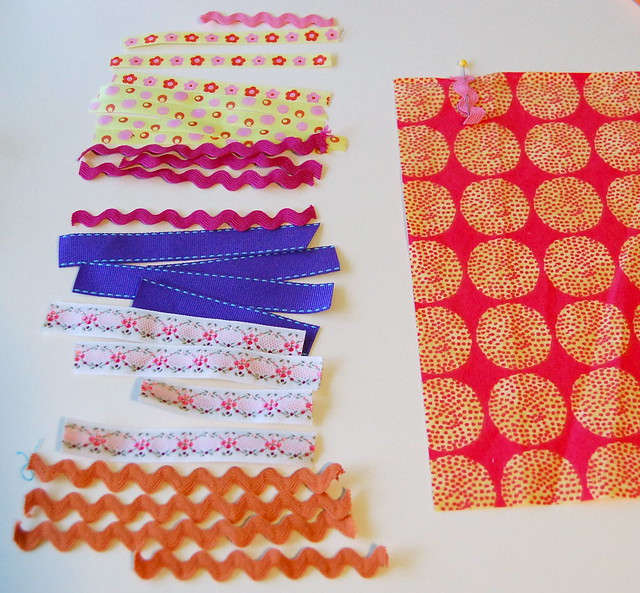
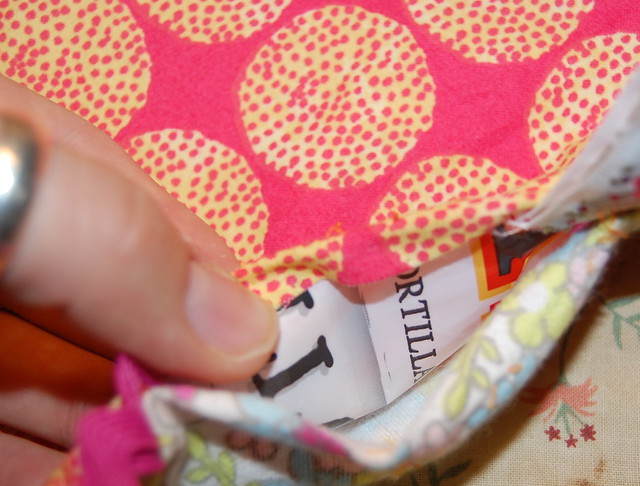
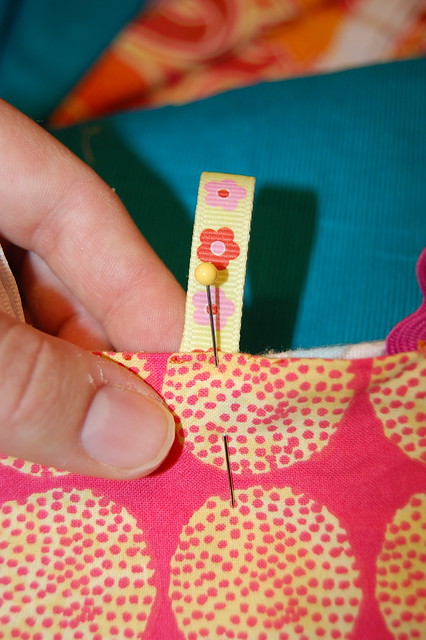
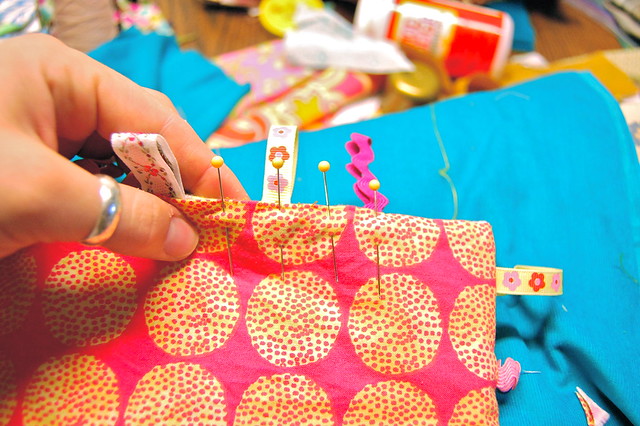
These crib teethers were super fun to make.
I used all the fabrics that were present in the bedding set,
then added some other coordinating fabrics from my stash so it wasn't too matchy-matchy.
And I also used mismatched buttons with elastic closures.
I love the end result and should probably make some for Ellie.
She has two whole teeth. 
DSC_0130

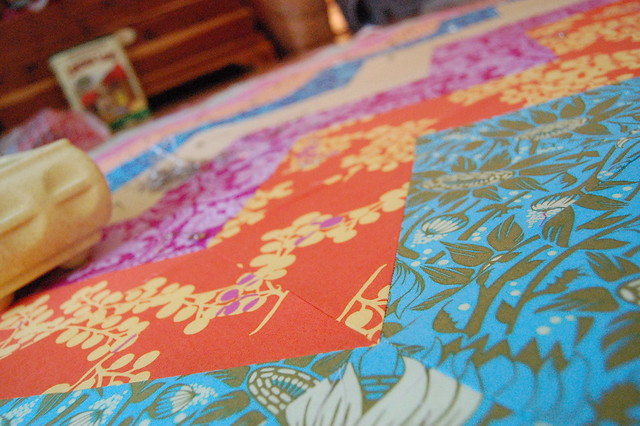
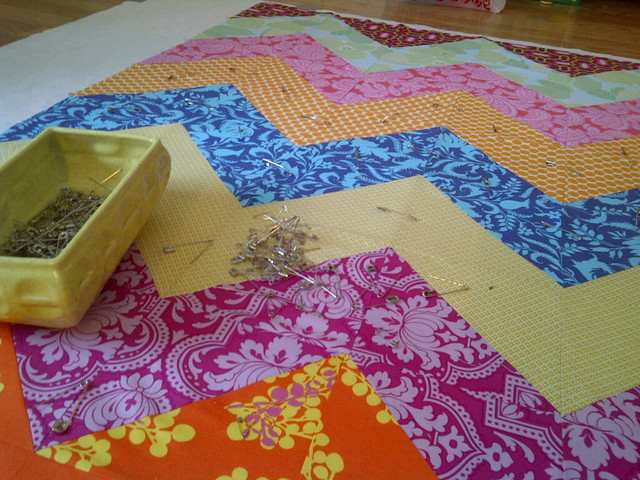
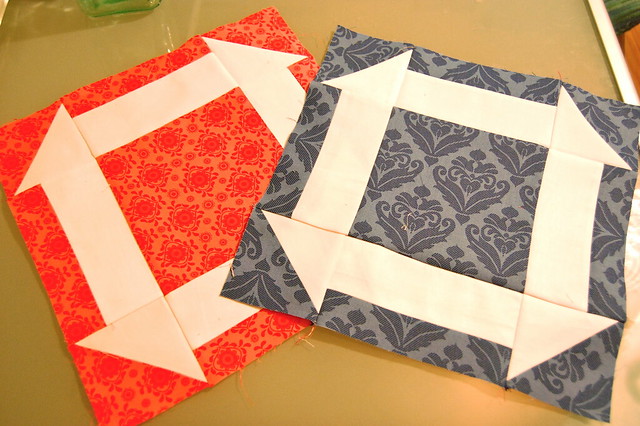
I also took a horrible picture of the crib quilt,
and it just so happens to be the only one of the quilt itself.
So please, enjoy this awkward and slightly confusing picture: 
DSC_0137

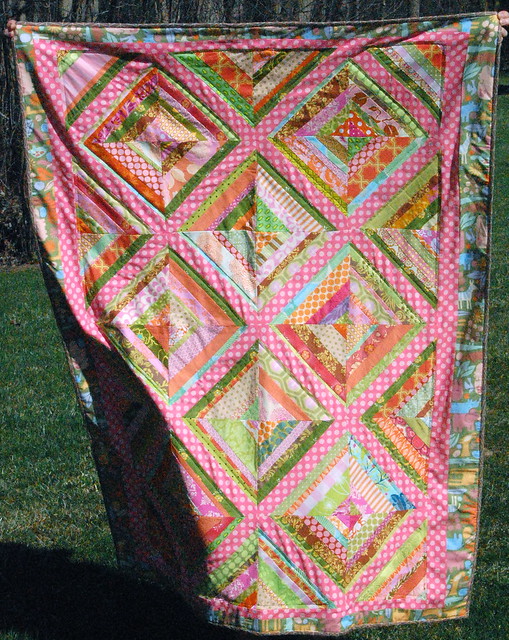
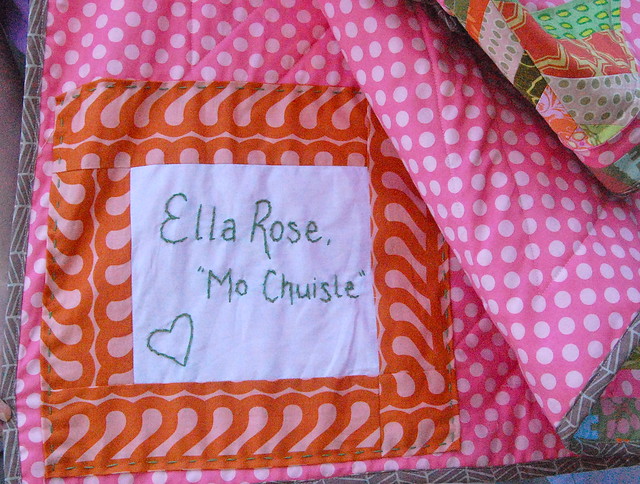
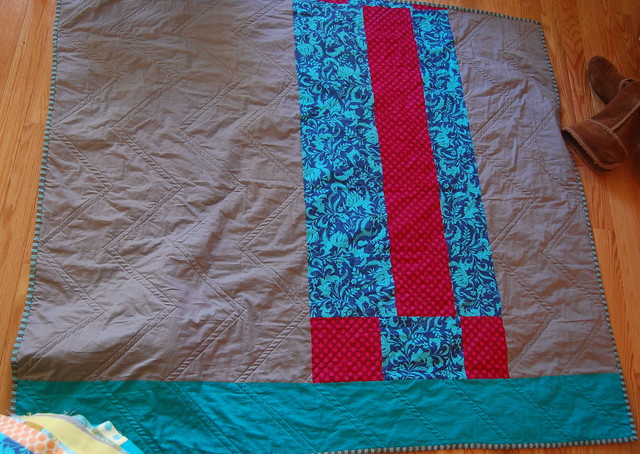
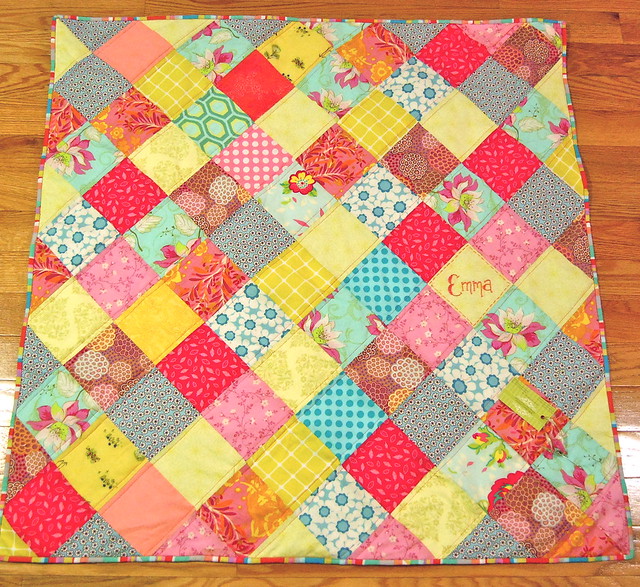
Here's a shot of the back of the quilt. 
DSC_0134

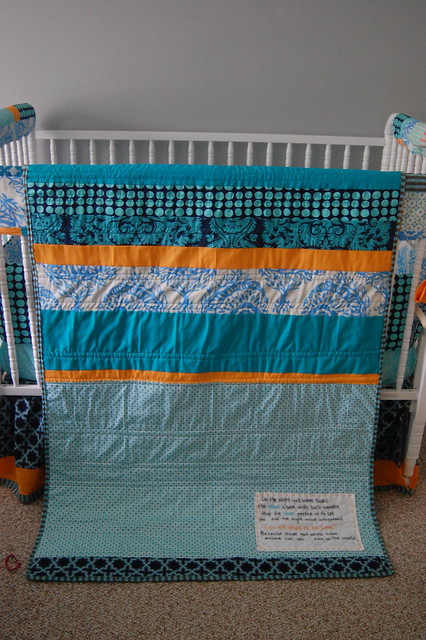
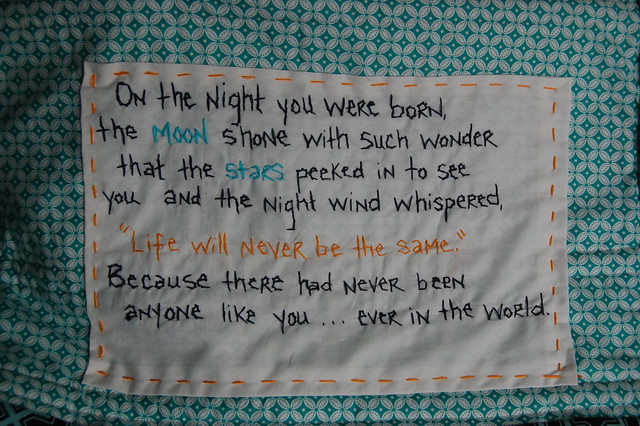
And the hand-stitched label.
DSC_0133

Here's a birdie mobile.
DSC_0147

I LOVE!
DSC_0152

And a standard pillow sham for later when crib turns into toddler bed.
(Talk about thinking ahead!)
DSC_0140_3


That's it for now.
I'm going to ease back in to this old comfort.
I enjoyed my little hiatus, however I'm so glad to get back to this.
It's a nice place for my to empty my head.

And in case anyone was curious, which I'm sure you're not really but I'm going to tell you anyway because I can...
DSC_0129
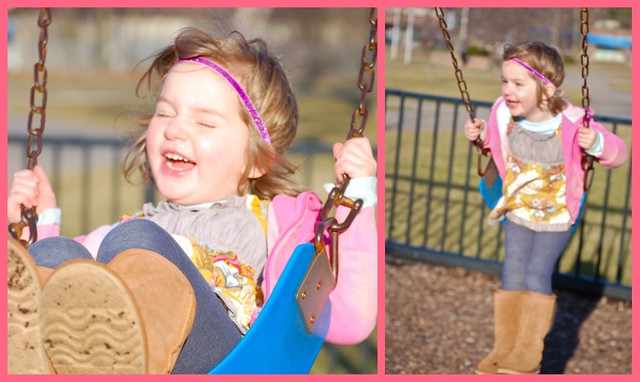
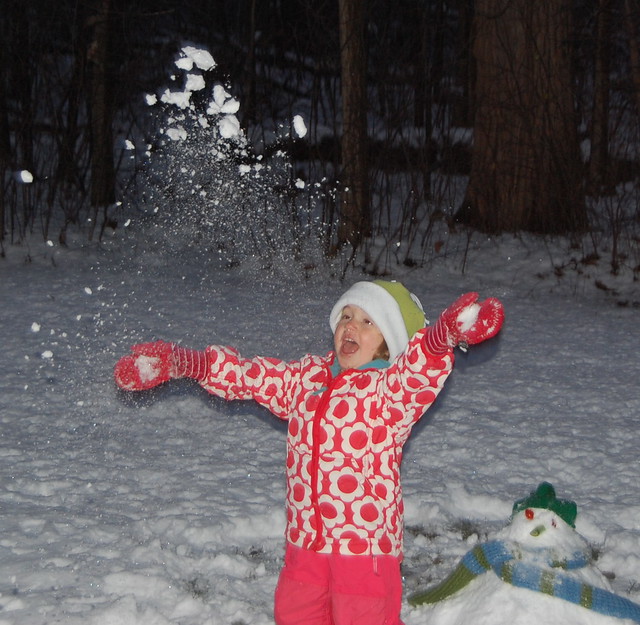
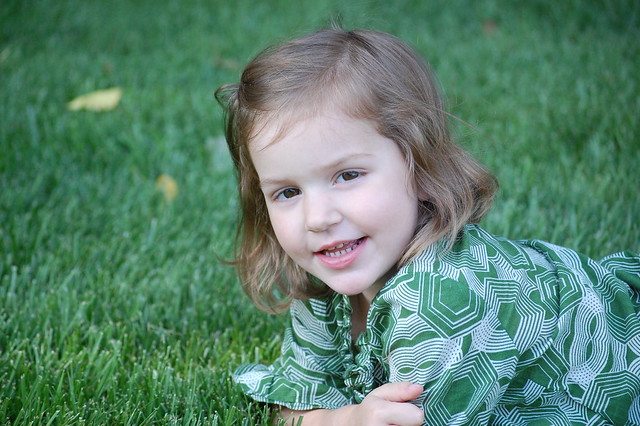
Willow has hair long enough for a ponytail.
This is a big deal in our house (for her).
However, she will rarely never let me actually put it in a ponytail.
She's a strange child.

DSC_0167

Willow also broke her leg and is in a cast over her knee.
She jumped from 5 stairs up. And missed the pillows.
She's about 1/4" to short for the crutches, therefore cannot walk.
The knee of her cast has been worn flat, as well as the top of her foot from scoot-crawling all over the place.
She's a trooper.
There's about 1 week left of this cast business and then we're free as two birds with no cast! Yay!

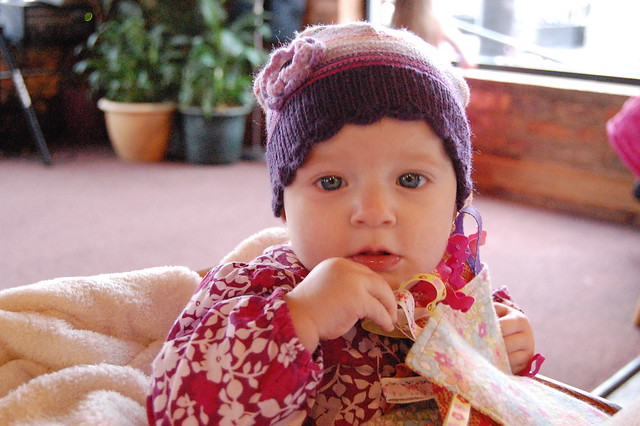
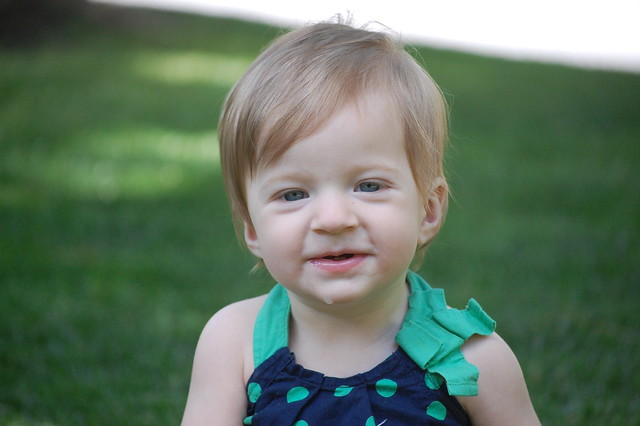
Ellie is getting big too:
DSC_0178
She started walking the day before her first birthday.
It may or may not have had something to do with me threatening her to walk before she turned one.
She's a smart kid.
And she still only has two teeth.

She loves clickers, phones, and food.
Emphasis on the food.
DSC_0146

Life is good.
What's going on in yours?
Let's get reacquainted. 

Friday, March 23, 2012

High on Spring.

We have been seriously enjoying some nice weather over here.
Spring is in the air and I've been inhaling deeply... one might even say I'm high on life.
I can't help myself.
I love nice weather so much. It makes me all happy. And probably nicer.
If my hubby were smart he'd move us to someplace where it's nice and warm all year long...
Right?

Picnik collage

Willow laughs hysterically every. single. time. I push her on the swings.
Like, loud belly laughs.
People turn to look and I catch them all chuckling sooner or later.
I mean, you can't help it, her laughter is contagious.

And the Squish also enjoys the swings!
DSC_0062

But she's more of a kick-your-legs-and-squeal sort of swinger.
As you can imagine, when my kids are on the swings, it's a very loud area of the park.
I love my loud and happy kids.

***

Here's another nursery set to share:
DSC_0076
Super fun, right?
This was actually my first "theme" bedding set.
(See that jungle print?)
I'll be honest, it was a little tricky finding a jungle print that was girly
and that also
matched green walls.
(These are not the green walls I'm talking about, these are my grey walls that I love dearly.)

DSC_0071

I think it all came together really well.
My fave parts of this set would have to be the crib skirt (too long for my crib...)
and the quilt.
DSC_0074

It's a string quilt... which I love so much!

DSC_0086

And the back:
DSC_0083

And a hand-stitched label to finish it off :)
I think that little quote is Irish for "my darling"(?)
DSC_0087

For the string quilt, I used the paper-piecing method to make my blocks...
I think I started with 9" squares of freezer paper
and my middle strips of fabric were 2" wide.

I just love a quilt roll...
DSC_0089

Wouldn't a whole bookshelf full of rolled quilts be amazing?
Hmmm....

Happy Spring!!


Tuesday, March 6, 2012

Shortcuts Make Me Happy.

Quilting shortcuts make me very, very happy.
The only problem is, there's not that many of them.
Except for when I make quilts for myself.
Then, there's lots and lots and lots of shortcuts.
I never take shortcuts when making quilts for others... I want to make sure I put my best work into what I send out into the world.
My quilts are a reflection of myself in some ways... and I don't want to look cheap and thrown together, if you know what I mean.

DSC_0095

But, oh man, when I make a quilt for myself I like to push the limits in the way of shortcuts.
I will cut corners like there's no tomorrow.
I don't know why this is.
Maybe my need for instant gratification?
Maybe because I sometimes feel guilty when making something for myself when I could be making something for somebody else so I try to make whatever it is as fast as possible?
Maybe because I'm usually trying to squeeze in the making of an entire quilt between several nap times?
(And who knows how long those last, right?)

DSC_0098

Whatever the reasons for my shortcut taking... this quilt was FULL of them.
And guess what?
It was one of the most problem free quilts I've ever made!
It came together like a dream!
Weird, right?
I know. It shouldn't make sense.
But that's the true story and it makes me ohsohappy!

DSC_0097

So, here's my shortcut-laden zig-zag quilt that I love dearly!

DSC_0006

I was originally inspired by this quilt.
I loved how big it was- so I asked her what her dimensions were and she kindly answered.
(HST method, 8x8" squares, and 10 x 12 rows...I love it when people share!)
My plan was to follow her dimensions exactly, but when I started cutting my fabric,
(that I've been saving for this quilt for quite some time!)
I realized I was only going to be able to make my quilt 8 x 9 rows.
Kind of a bummer, because I like the hugeness of the original quilt, but not a deal breaker for me.
Finished measurements are 56"x 64"... so it's still a nice sized quilt.

DSC_0007

Other shortcuts:
I didn't draw lines on the diagonals of my squares for making the HSTs
(I'm sure other quilters are cringing right now- sorry!)
I didn't iron or trim my HSTs once finished.
(another cringe!)
I didn't pin a single thing.
(but I never do when quilting...)
And, I didn't iron the completed quilt top before layering everything for basting.
Oh, and I didn't use a walking foot to do my quilting either!
That one was kind of an accidental shortcut because I forgot to switch feet (foots? whatever.)
But the zig-zag quilting was just easy peasy!

DSC_0006_2

Pieced back:
DSC_0004


All those shortcuts allowed me to take my time while basting...
I actually taped every layer down and pin basted (<---- my fave method!)
All of my points lined up perfectly... magically even!
I didn't have any bunches or uneven/mismatched corners.
(Unfortunately common in quilts I make for myself.)
And, I saved so much time I was able to hand-stitch the binding!
Yippee!

A fairly amazing trade off if you ask me!

Also, I've decided that this year I am going to make at least 10 quilts for myself.
I just decided this like a month ago.
Of all the quilting and sewing I do, it's a shame how few quilts I actually have in our home.

So, I made a list:
(I just typed this exactly how I wrote my list- so it may not make total sense to everybody!)
  1. Asterisk quilt
  2. Herringbone quilt (red, yellow, aqua)
  3. Houndstooth
  4. Swoon blocks (yellow/pink/orange/brown with linen)
  5. Granny squares (scrappy)
  6. HUGE patchwork (scrappy)
  7. Loulouthi whole cloth quilt (handquilted)
  8. Willow/Ellie quilts (room colors)
  9. HUGE lonestar quilt (brights)
  10. Plus quilt (yellow and purple)
  11. Log Cabin quilt
  12. HUGE(er) zig-zag quilt (10 x12 rows)
  13. Subway tiles
  14. Mod Bento Box (aqua, orange, yellow, grey)
  15. Big zig-zag quilt
  16. Finish my king size string quilt and get it quilted
My goal is to make at least 12 quilt tops and of those tops, complete 10 quilts.
I get a lot of my inspiration from other quilts/quilters... I have a flickr group of my favorites here if you'd like to check it out.
There's lots of amazing stuff out there!

Sneak peek of the next quilt I get to cross off the list:
DSC_0004

Happy Creating everyone!

And a big thanks to everyone who welcomed me back... you're the best!

Saturday, March 3, 2012

Lame.

Where have I been?
It's really lame...
Like really really lame.
Are you ready?

Ok, so... around the 12th of December or so somebody may or may not have
spilled coffee
on the computer keyboard.
(And lied about it...)
The bottom row of keys may have stopped working.
(It's basically impossible to do anything without the spacebar, FYI)
We may have put off buying another keyboard for no particular reason.
at.
all.
(Other than having to actually go to the store to purchase one... I guess. Lazy, I know.)

Having fun...

And that's about it.
Yup.
Super lame.
I was absent for 3 months because I spilled coffee on my keyboard and didn't buy another one.
My bad.

Pile of possibilities...

The good news is that I have been sewing like crazy since the coffee mishap!
I've got lots of projects to share!
I really want to give everything its rightful post... and I made a promise to myself that I won't try to cram the last 3 months into just a few posts.
Which I could totally do because I am SO PUMPED that my hubby brought home a keyboard today!
I could sit here for hours and just write the longest post known to man.
But I will spare you.
And it's kinda more fun to write lots of posts anyway.
More pictures...

nap time progress...

And I'm just going to go ahead and claim this post as the
breaking-in-the-new-keyboard-and-getting-back-into-the-blogging-groove post.
Does that work for you?
It works for me...

Thanks for being patient!
I hope I didn't lose any readers because I appreciate every single one of you!
Stay tuned...

Thursday, December 8, 2011

A few finishes, a snowblob, and a crawler...

Oh my word.
I thought I was getting a good start on Christmas gifts this year...
I was proud of myself.
By the 1st of the month
I had all necessary supplies purchased, everything cut and prepped,
tutorials tagged, pages of sewing books marked, and pins on Pinterest up the yin-yang.
Everything got stacked neatly in a laundry basket, just waiting to be picked up and
sewn together with love.
But, I think I got a little cocky.

Because now...
I am in complete panic mode.

The good news is that the first Christmas party is 9 days away.
The bad news is that the first Christmas party is 9 days away.
Am I excited?
Heck yeah.
Am I totally stressed?
You know it.
Should I even be blogging right now?
Not a chance.

I just love giving the perfect handmade presents
- maybe a little too much-
because I've actually overflowed into a second basket.
Oh goodness.

I would love to show
all the Christmas presents
I'm working on, but I can't, because that would ruin the surprise for those getting the presents.
DUH!

So instead, I will show other things I made that aren't Christmas presents, like this:
DSC_0116_2

It's my latest finished quilt.
It felt good to finish up a quilt.
I haven't done a quilt in a while, and this one was, well, it was just nice.
I made it for a woman my hubby works with.
I love it.
I think it's perfectly girly and sweet.
I was sick of patchwork, but I had already cut all the squares,
so I turned them all on point.
It was my first time trying that out,
even though I've wanted to for quite some time,
and I dig it.

And I love the stripy binding.
But, I mean, who doesn't love a stripy binding?
DSC_0118

I hand-stitched the sweet little name in one of the
less-busy squares
to add an extra little touch of 'special' to the quilt.

***

Here's my November contribution to do.Good stitches' Grace circle.
DSC_0111

I took this picture at night,
so the colors are WAY off-
but that's a coral square and a navy square.
We all used this tutorial for the 'hole in the barn door' squares from Mary Catharine's blog. She's really sweet. And talented.
And I'm also using another one of her tutorials for a Christmas present.
But I'm not going to spoil it, so that's all for now.

***
And Willow got invited to her first birthday party
(that wasn't a family member).
So, of course, I decided her friend needed to have a handmade, hand-stitched dolly.
And I made this decision the night before.
At about midnight.
DSC_0106
Hence the bad picture taken at said party...

***
We also made a 'snowman' who is actually more like a snowblob.
You need a certain kind of snow for the making of snowpeople, and we just didn't have it.

Note to self: check snow before promising snowman to small child.

So, with that preface, I introduce to you, Carl:
DSC_0011
He's basically a pile of snow with a hat, scarf, celery nose, tomato eyes and stick arms.
He's actually quite adorable.
Or, was quite adorable. Carl has since vanished.

Note to self: Warn small child what happens to beloved snowblob when temperature rises.

We had fun in the snow while it lasted...
DSC_0007

***
And this little one is getting SO big.
DSC_0072

Look who's crawling!
DSC_0029

That's all for now because the doctor's office just called to remind me of Ellie's well-visit today, which I completely forgot about,
and now I must go bathe, dress, and get 3 people ready for the public eye in a very short amount of time.

Wish me luck.

Wednesday, November 30, 2011

Crunchy Fuzzy Loopy Tag Blankie Tutorial - Handmade Christmas

Ellie is completely enamored with anything that makes
loud crunchy noises.
She also likes to suck on blankets and put her fingers through anything that loops.
And I'm pretty sure fuzzy things make her really happy.
She hasn't exactly told me,
but I think I'm picking up what she's laying down, if you know what I mean...

I magically fused all of her baby loves together into something I like to call,
"The Crunchy Fuzzy Loopy Tag Blankie".
In case you didn't pull it from the name, the blankie is crunchy, fuzzy, and loopy.
In other words, it's an auditory/tactile playground for babies.

It was also extremely easy to make with minimal materials.
2 pieces of scrap fabric
1 empty cereal or chip bag
ribbon scraps
pins
sewing machine

So easy, in fact, that I decided to write a tutorial for it.
DSC_0038

Now, as Willow would say, let's get this party started.


You need:
*2 pieces of fabric (quilting weight or flannel) that are the same size- go search your scraps.
Cut to any size you want.
DSC_0014
I used quilting weight for one side, flannel for the other to get some different textures in there.

*1 empty bag of chips or cereal- go search your pantry.
You need any kind of bag that makes a crunchy sound and can get wet.
DSC_0010
Clean the bags and let them dry.

Then, cut them up the back seam so they're easier to work with and lay flat like so:
DSC_0011
Cut the bag to be the same size as your 2 fabric pieces.

*Scraps of any non-wired ribbon or ric-rac - pieces should be at least 2" long to work well
DSC_0013

Cut longer pieces into 2"-4" strips to make the loops.
DSC_0015

Take one of your two pieces of fabric and place it right side up.
You will pin all your 'loops' to the right side of this fabric.

Now, take your 2"-4" pieces of ribbon and, one at a time, fold them in half, making a loop.
Line up the cut edges of the ribbon with the outside edge of the fabric,
with the looped end pointing towards the inside of your fabric rectangle and pin in place.
Continue along all 4 edges of fabric.
You should end up with something that looks like this:
DSC_0017
Make as many or as few tag loops as you want.

When you've finished pinning all your loops,
take your other piece of fabric and place it on top of the fabric you just pinned the loops to, right sides together.
(So the wrong side is facing up)
Pin in place.
DSC_0020

Next, take your piece of crunchy bag and place it on top of the fabric you just pinned.
Pin in place.
DSC_0021

You should have a 'sandwich' of those 3 layers:
taggie blankie

Take your 'sandwich' to your sewing machine, making sure the crunchy bag is on top.
Sew together with 1/4" seam allowance around 3 edges.
DSC_0027

On the 4th edge, make sure to leave a gap about 3 inches wide.
DSC_0029

Now, carefully turn your blankie sandwich completely right-side out through that gap.
Use a pen or the wrong end of a paintbrush to push the corners out from the inside so they're nice and pointy.
Smooth everything out.

To close the gap, turn under the open edges of fabrics 1/4" and pin.
DSC_0031

If you had any loops located in the gap, you will need to re-pin those.
DSC_0033

Make sure you place the loops in between the two fabric pieces and 1/2" inside (deep), with the looped end pointing out this time.
Pin in place.
DSC_0036

Now, stitch just inside the edge of the blanket (about 1/8") around all 4 edges.
Backstitch at beginning and end.

Congratulations... you're done!!!

Now you have a super-fun Crunchy Fuzzy Loopy Tag Blankie to give to a tiny human!
DSC_0038


And, if they're anything like Ellie,
they will love it so much that they squeal with delight and whip it around faster than the speed of light to blur the colors and hear it crunch.
Picnik collage

Let me know if you have any questions or if anything is unclear...
I'll leave you be so you can get to work on your new projects.